Do you have an old tablet lying around? Want to turn it into a smart home hub? You’ve arrived at the right place! From choosing the right accessories to hand-holding your way through the complete setup, expect me to cover everything in an easy-to-understand manner.
The approach of turning an old tablet into a smart home hub is not just about managing smart IoT devices. Instead, it helps you save money as you’d no longer need to invest in a dedicated smart home tablet, monitor, or smart assistant device like Amazon Alexa or Google Mini. It would also eliminate the piling carbon footprint.
Yet, the process of turning an old tablet into a smart display is easier said than done. From setting up various functions and managing accessories, the steps can be tedious and often unrewarding. This is why I have compiled a detailed guide to help you manage everything.
Contents
Pre-requisites [Things You Need]
Before you start using your old tablet to control smart home, here are the things that you would need to make the entire process work out just fine:
- An Android tablet that at least runs Android 5.0, or
- An iPad that runs any version of iPadOS no later than 3 years
- An active WiFi connection with a good device handling capacity
- An external microphone or a speaker with a built-in microphone
- A smart plug to automate the charging
- A couple of smart IoT home gadgets that need to be controlled
- Wall mount in case you want to keep the device suspended
How to Turn any Old Tablet into a Smart Home Hub?
Now that you know the prerequisites, it is necessary to follow the steps to absolute perfection. Let’s begin!
Step 1: Clear the Tablet’s Homepage
First, you need to forget that you are using a tablet by wiping the slate clean; I mean quite literally. You can make sure you remove the widgets and app icons by hard pressing them and then hitting the remove sign. This part would help you get a smart home tablet dashboard.
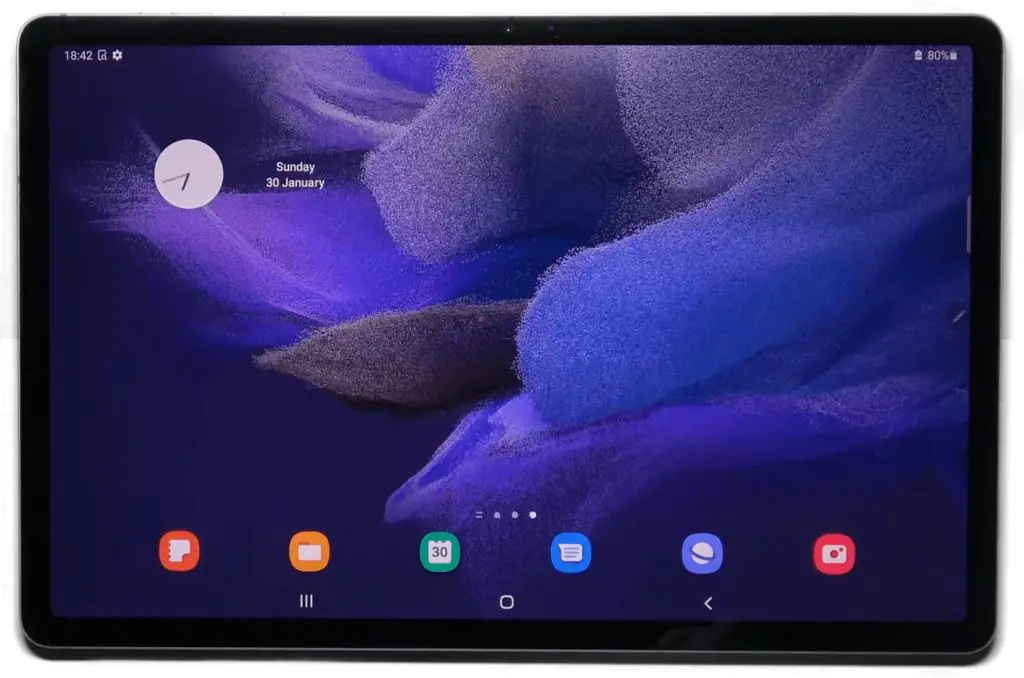
On top of that, you might want to consider getting a bigger clock to help you keep track of the time while operating the smart display to control other gadgets.
Step 2: Remove the Screen Lock
Yes, this is more of an obvious step as you wouldn’t want to pin or finger-unlock the tablet for home automation whenever you need to send a command to a smart device.
Steps to remove the lock screen from a tablet:
- Open the device settings
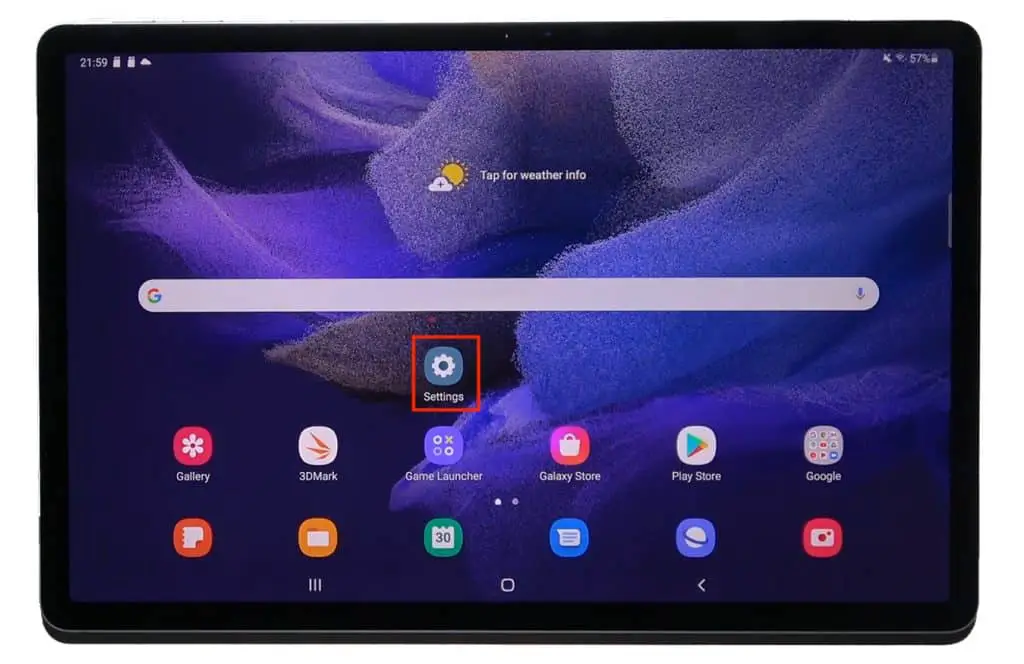
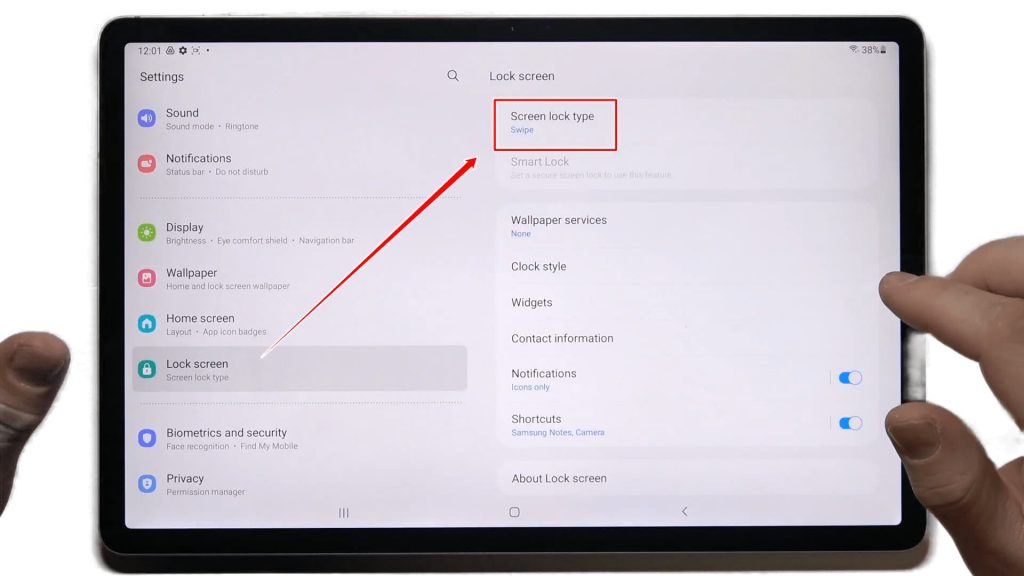
- Look for the Lock Screen menu.

- Once inside the Lock Screen menu, tap on the Screen Lock Type option.
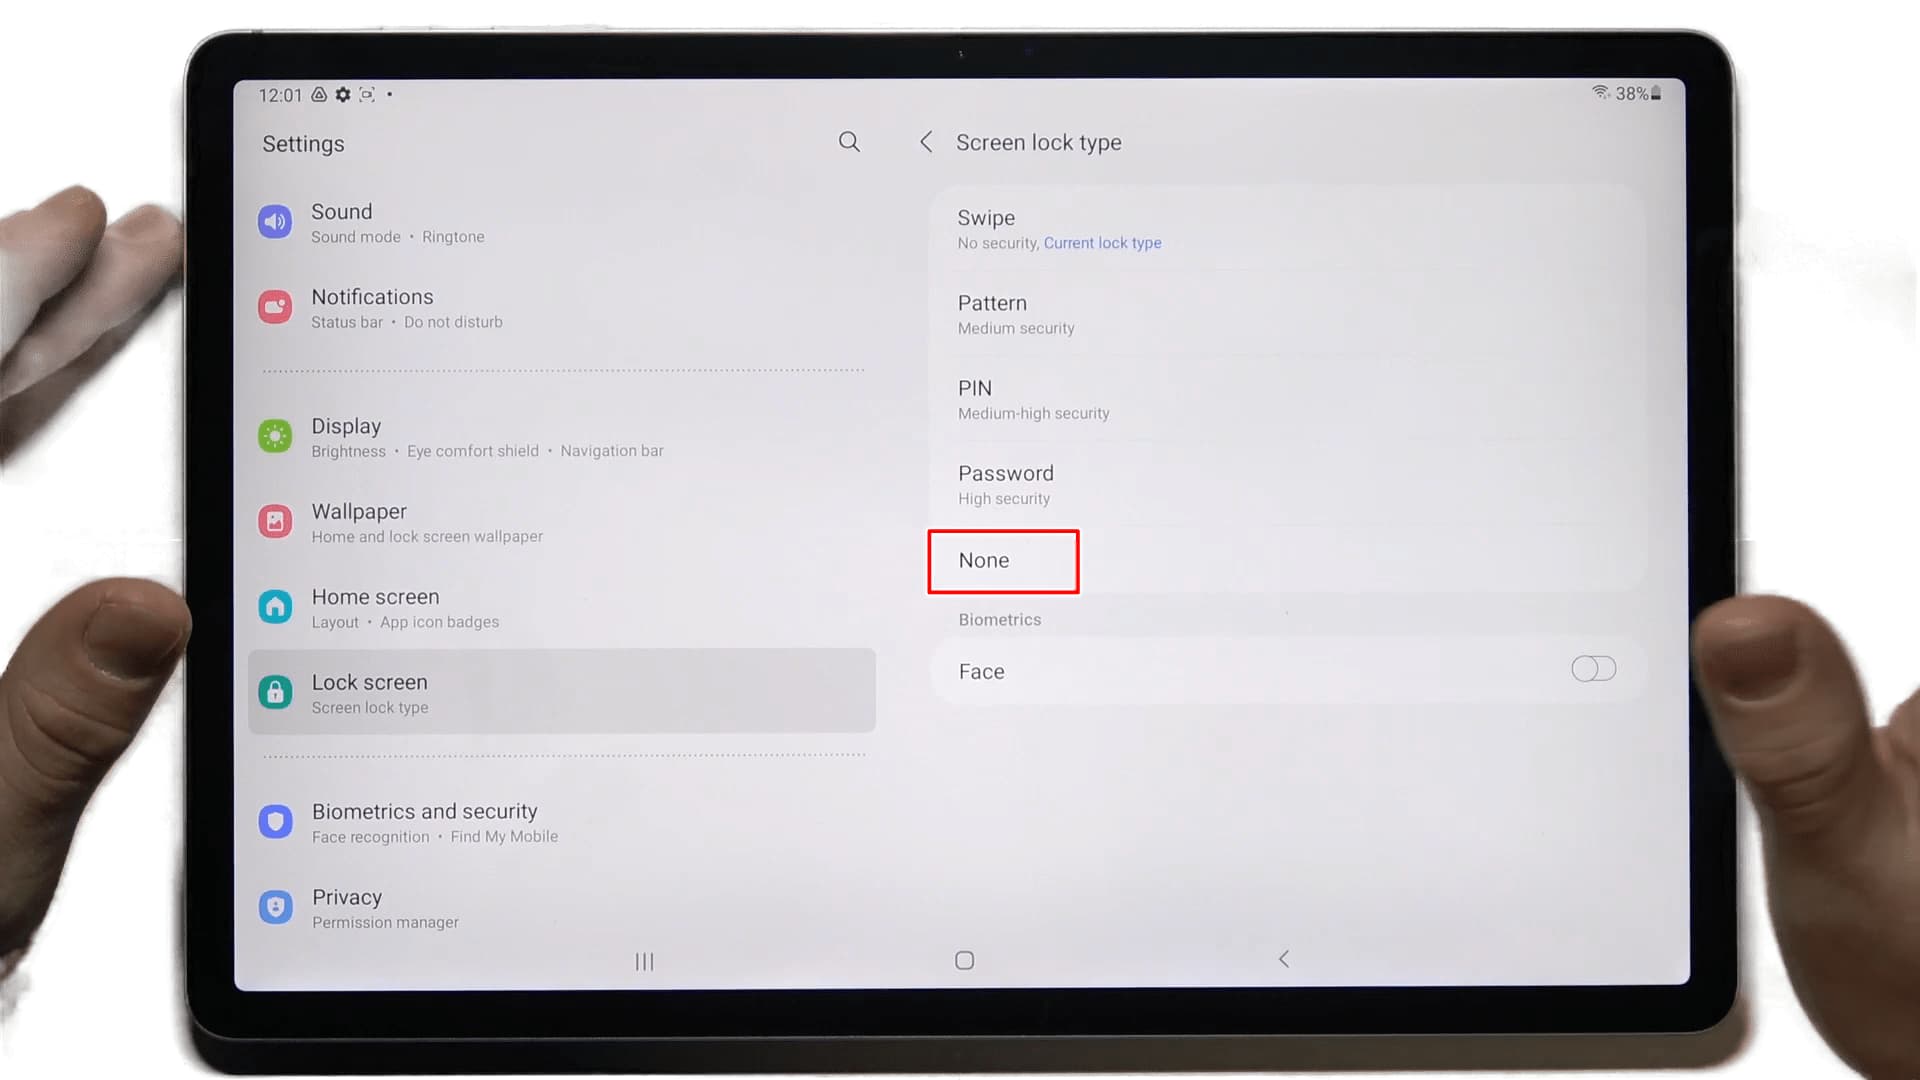
- Here, choose the ‘None’ option listed at the end. That’s it; you’ve successfully removed the lock screen security.
Step 3: Set Up the Voice Assistant
Presuming that you already have a tablet with Google Assistant, Alexa, or Siri (in case you have got an iPad) support built-in, I would ask you to set it up just to ensure that it responds to commands. The sole purchase of the voice assistant is to ensure that your smart devices can be controlled the smart way — that is, from a distance.
Steps to Enable Google Assistant for Tablets:
- Go to the Google folder on your tablet and open the Google app.

- Now, tap on the ‘More’, followed by the ‘Settings’ option as denoted in the picture below.

- It would open another screen where you need to navigate to the ‘Voice’, followed by the ‘Voice Match’ option, as shown in the picture below.

- Here, turn on the toggle next to the ‘Hey Google’ option. This will enable the app to trigger voice assistant whenever you speak ‘Hey Google’ or ‘Okay Google’.

Steps to Enable Siri on iPads:
- To turn iPad into a smart display, you need to activate the Siri voice assistant. Head over to the iPad settings.
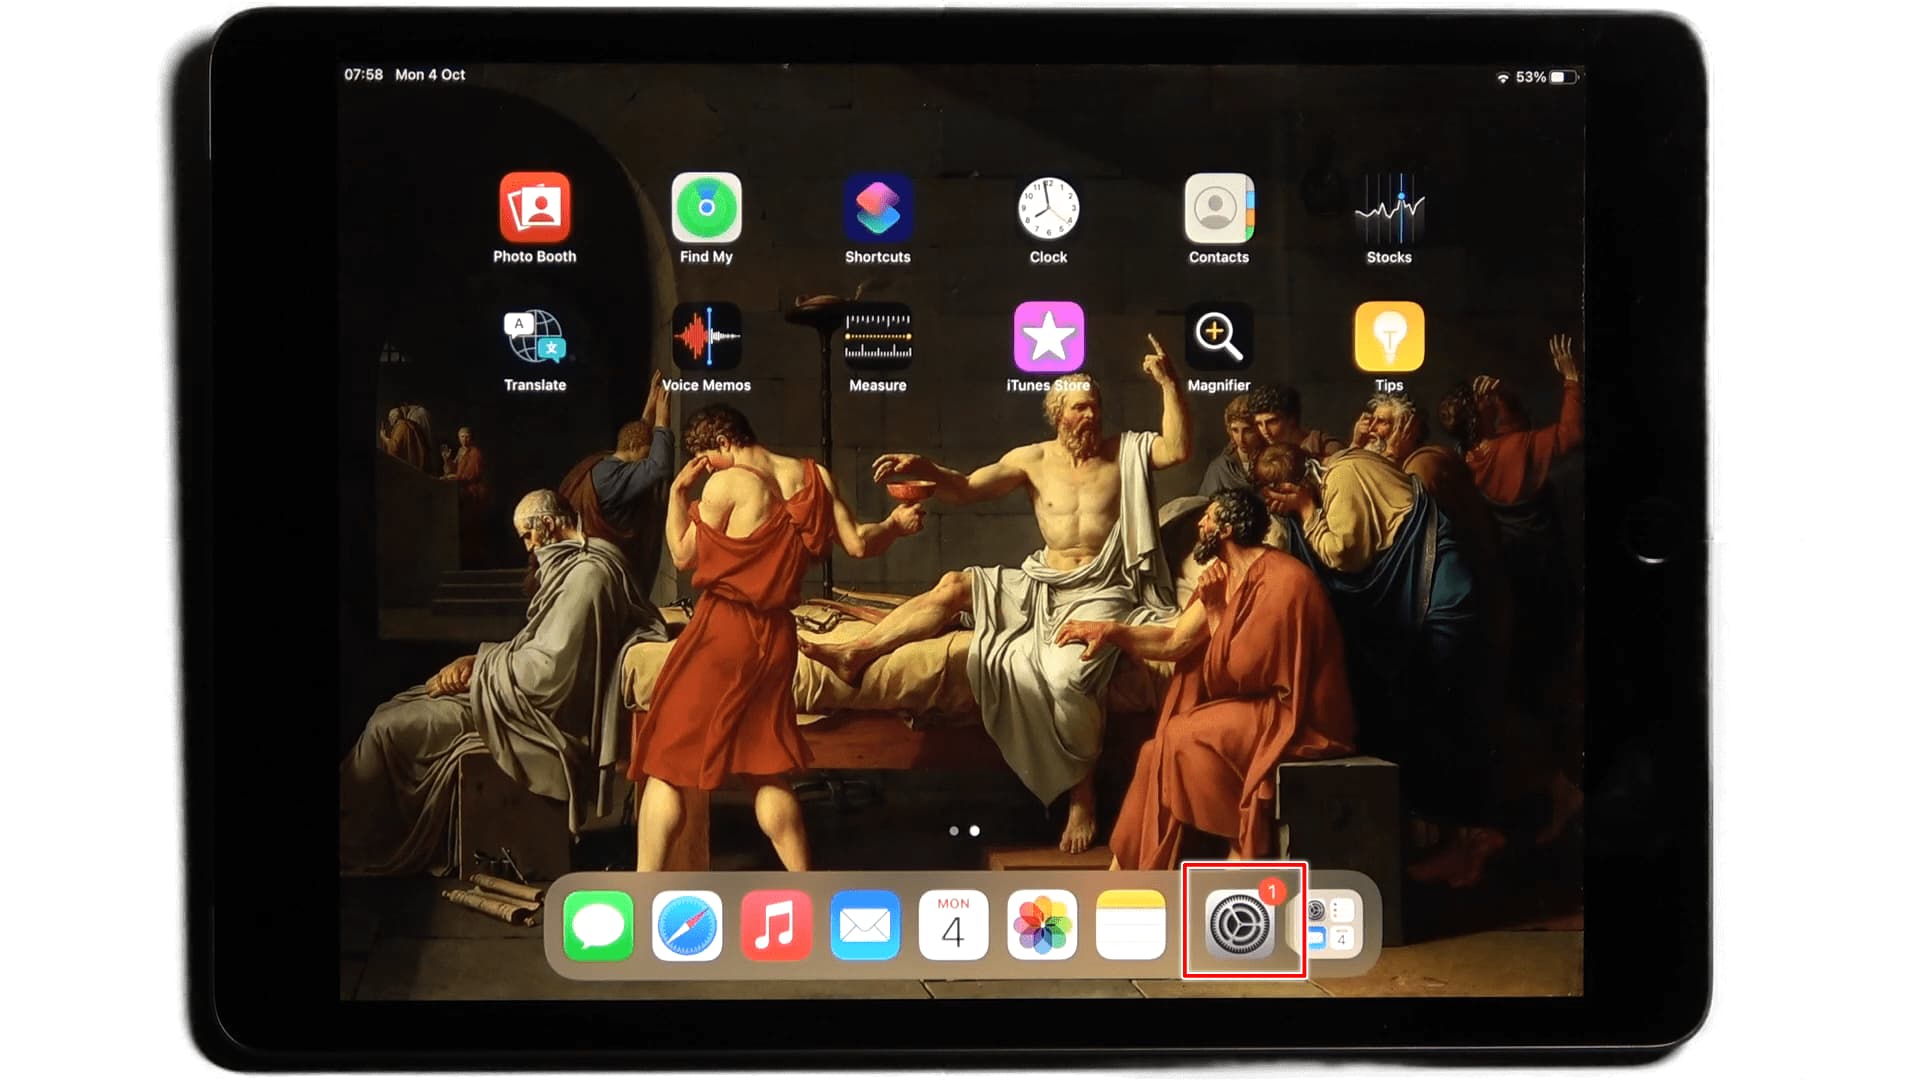
- Navigate to the ‘Siri & Search’ menu. You’ll see an option called ‘Oye Siri’. Enable the same by turning the toggle on.

- That’ll open up a popup. Tap on ‘Enable Siri’ to confirm the action.
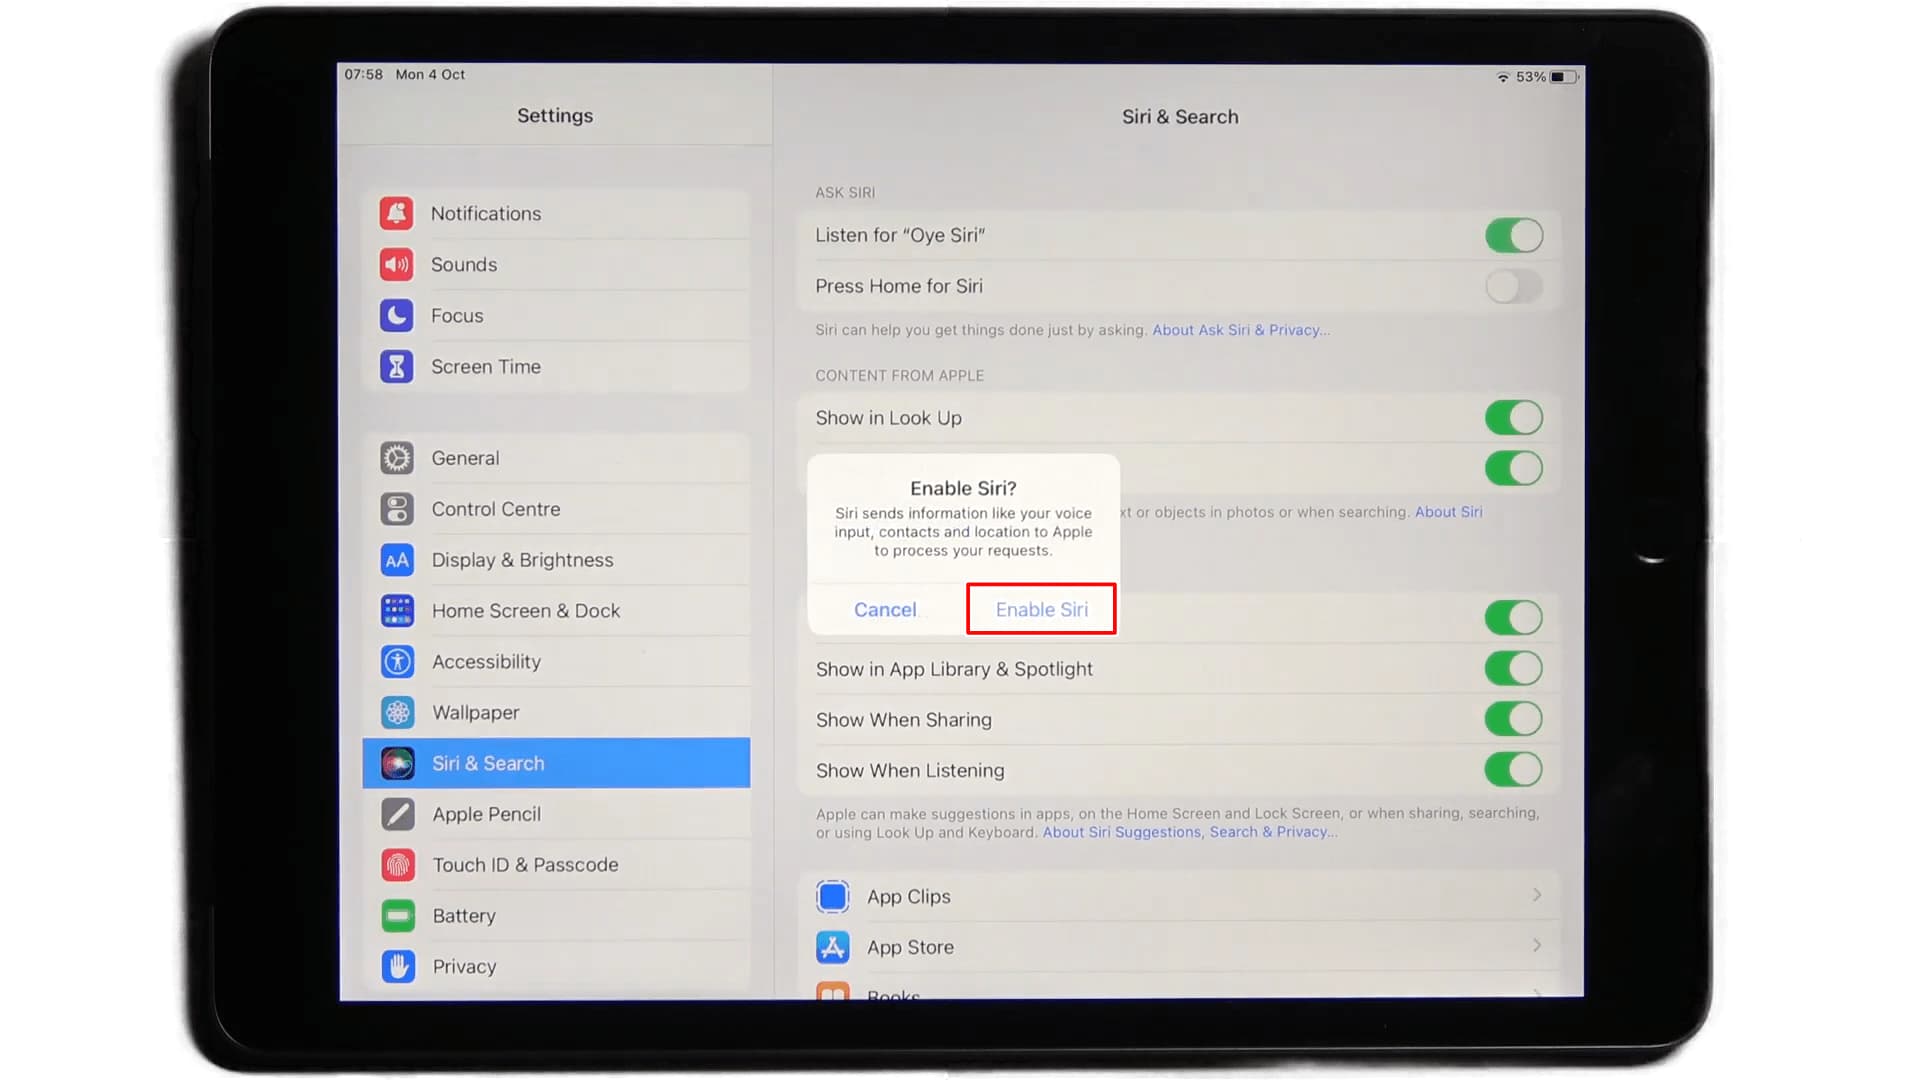
- Ensure that the preferred Language for voice search recognition is set to ‘English (US)’.

- Next, you’ll be prompted with a new window to begin the ‘Oye Siri’ setup. Tap on Continue.
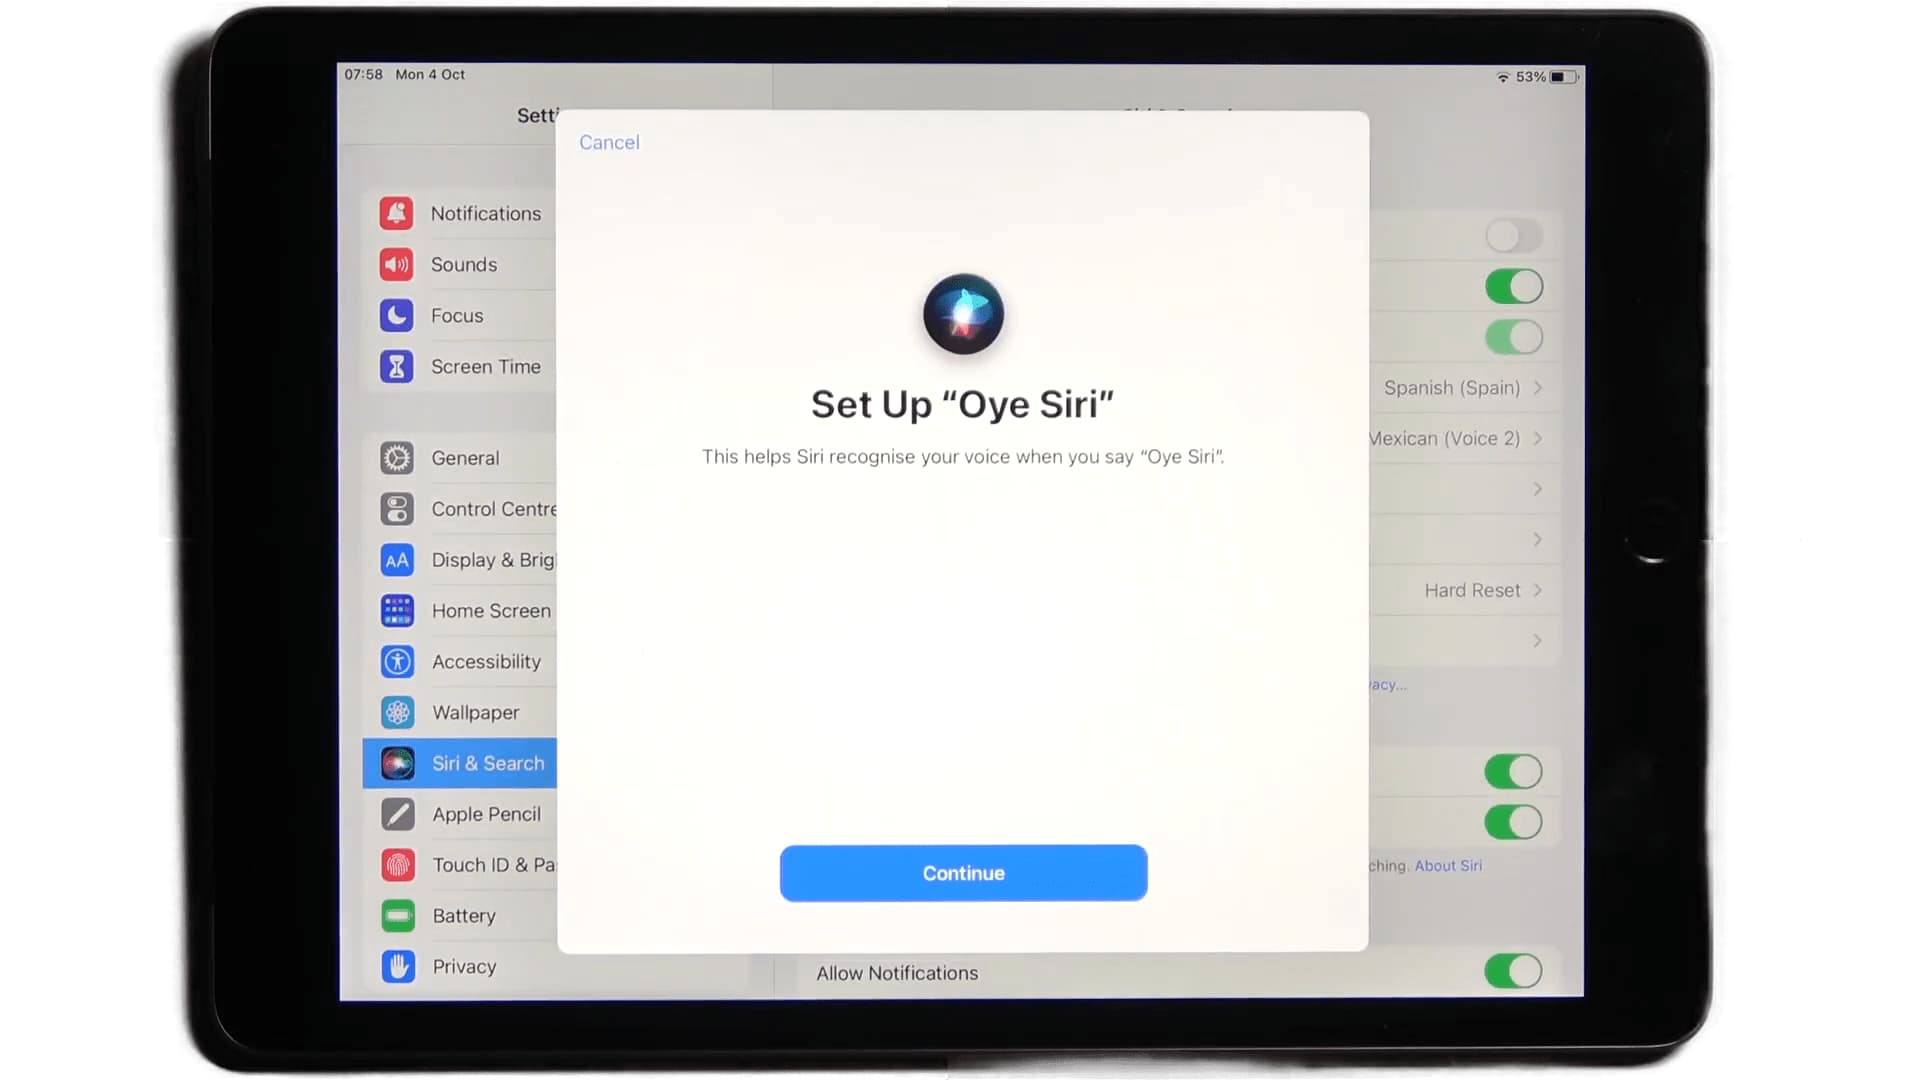
- Next, it will ask you to say a couple of commands in order to recognize your voice better. Say them until you see ‘Hey Siri’ is ready. Now you’re ready to turn iPad into a smart display.
Step 4: Set the Microphone Right
It’s cool that your tablet has voice support, but there is a catch to it. Most tablets and smartphones are programmed to operate close range, and therefore, shouting at the tablet to fix the temperature on your thermostat isn’t going to sound all that sane. Just kidding!
I mean, it would help if you attach an external microphone that connects to a 3.5mm audio jack (and not the USB-C ones, as you’d need the USB-C port empty for charging purpose). Although the charger would stay connected to the tablet all the time, I have a solution to schedule charging. Stay tuned as I’ll discuss this in detail in step #6.
To make it an even better and more practical setup, you can have a wired speaker with a built-in mic that easily captures every command. If that sounds good, I’d recommend getting LENRUE’s USB-powered 10W speaker. (You’d need a USB Type-A adapter or input strip to power the same)
Step 5: Install the Relevant Apps
Remember, the tablet won’t just be a smart remote or a controller but a smart gadget. Therefore, if you want to play some music or ensure that it has all the features available even to control your TV or any other smart device, you might need to install the relevant apps to it, including the likes of Spotify, YouTube, and more.
This will enable the voice assistant to perform a specific activity associated with an app.
Step 6: Prep Up Connectivity & Charging
Here comes the most important part. Ensure that all smart devices and tablets operate on the same wireless network. It is better to select the band and set it to 2.4GHz to extend the reach.
Next, you must ensure that your tablet keeps charging optimally and automatically. To automate the charging process, you’d need to get a smart plug. Preferably one that works with Google Assistant or Alexa (based on your home automation setup).
You can get any good smart plug ranging from $10 to $20. I personally use the Wisebot’s 2-in-1 smart plug, and it works just fine. It will let you schedule a power supply on time. This means you can set up a time when it would begin charging the tablet. Similarly, you can assign a specific time when it should stop taking power.
Not only it would remove the hassle of putting the tablet in charge, but it would also keep the battery health intact and cut off the charge cycle if and when required. Isn’t it a great idea?
Step 7: Choose the Right Place for Your Tablet
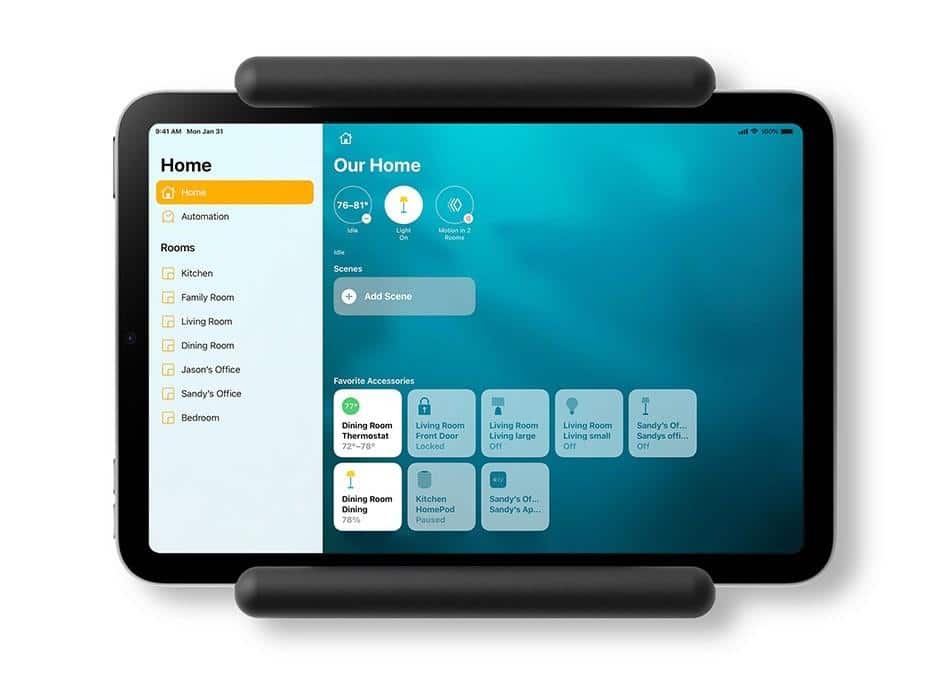
Depending on the wireless band you want it to operate in, you might need to find a good spot for your tablet to control smart home devices efficiently.
Also, the choice of tablet placement depends on the charging outlet proximity and even the heat dissipating ability of the same. I’d suggest finding a spot where the air circulation is good. As a rule of thumb, place it at 60 to 75 degrees from the surface to avoid overheating.
If possible, get a wall mount for your tablet. Assemble it near the power outlet. Make sure you select the right size for your tablet mount. If you don’t know, follow my guide on measuring the tablet size. That’s pretty much it. Your tablet for home automation should be ready by now. Use it as a smart home remote control and make the most of it.
Frequently Asked Questions
1. Can I use a tablet as a smart home hub?
Any tablet that isn’t too old can be used as a smart home hub, provided it has the OS that accommodates a fully functional voice assistant, allows you to set up wired speakers and microphones, and can retain a charge.
2. How do I turn my old tablet into a universal smart home remote?
The best approach to turning an old tablet into a smart home remote is to first optimize the same by removing the screen lock by heading over to the settings, deleting additional screens, if any, and then connecting it to the same network that your TV or any other remote-controlled smart device is connected to.
3. Can you use a tablet as a Nest hub?
If you plan on using an old tablet as a Google Nest hub, make sure it at least runs Android Lollipop and allows you to set Google voice assistant as the choice of input.
4. Do you need an active internet connection while setting up a smart hub?
While an internet connection is desired, especially if you want to run apps like Spotify and YouTube, it is more than important to have the smart hub and the smart gadgets connected to the same wireless network.
Conclusion
Having an old tablet lying around isn’t trouble anymore. Instead of trying to flip it for some money, you can simply use it to set it up as a smart home hub and turn old tablet into a smart display. Be it identifying uses for the old Android tablet or using the iPad as home automation control, prepping up any old tablet as a smart remote or even a hub is now easier than ever, especially if you follow the steps mentioned above to precision.


Leave a Reply