Are you unable to access the WiFi on your Kindle Fire device? Well, you are not alone. Many of my readers have reported that their Kindle is not connecting to WiFi. This is why I decided to discuss all the possible solutions that will help you fix the Kindle Fire WiFi connection failure once and for all.
But before jumping right into the solutions, it’s essential to know the possible causes.
Contents
Why Won’t your Kindle Connect to WiFi? [Possible Reasons]
1. Software-Related Issues: There is a possibility your device is running on an outdated version of the operating system. Sometimes it stops your Kindle from connecting to the internet.
2. Hardware-Specific Problems: If your device has aged well, there is a fair chance the wireless antennas are damaged. In this case, your device won’t be able to detect Wi-Fi networks at all.
3. Issues With Your Wireless Router: Any technical problem with your wireless router or network provider will result in Kindle won’t connect to WiFi.
4. Other Reasons: There may be other reasons behind the Kindle WiFi not working, such as airplane mode being activated by mistake, password-related issues, hotspot is activated, etc.
Kindle Won’t Connect to Wi-Fi: 5 Easy Fixes
Now that we know all the possible reasons behind the Kindle Fire Won’t connect to the WiFi issue, let’s try out some fixes:
1. Perform Basic Troubleshooting
I will take you through some basic troubleshooting first, and if Kindle won’t connect to the internet persists, you can move on to some more technical solutions.
Note: You should try connecting your other device (smartphone or laptop) to the same Wi-Fi router to ensure the router is working fine.
Turn off Airplane Mode
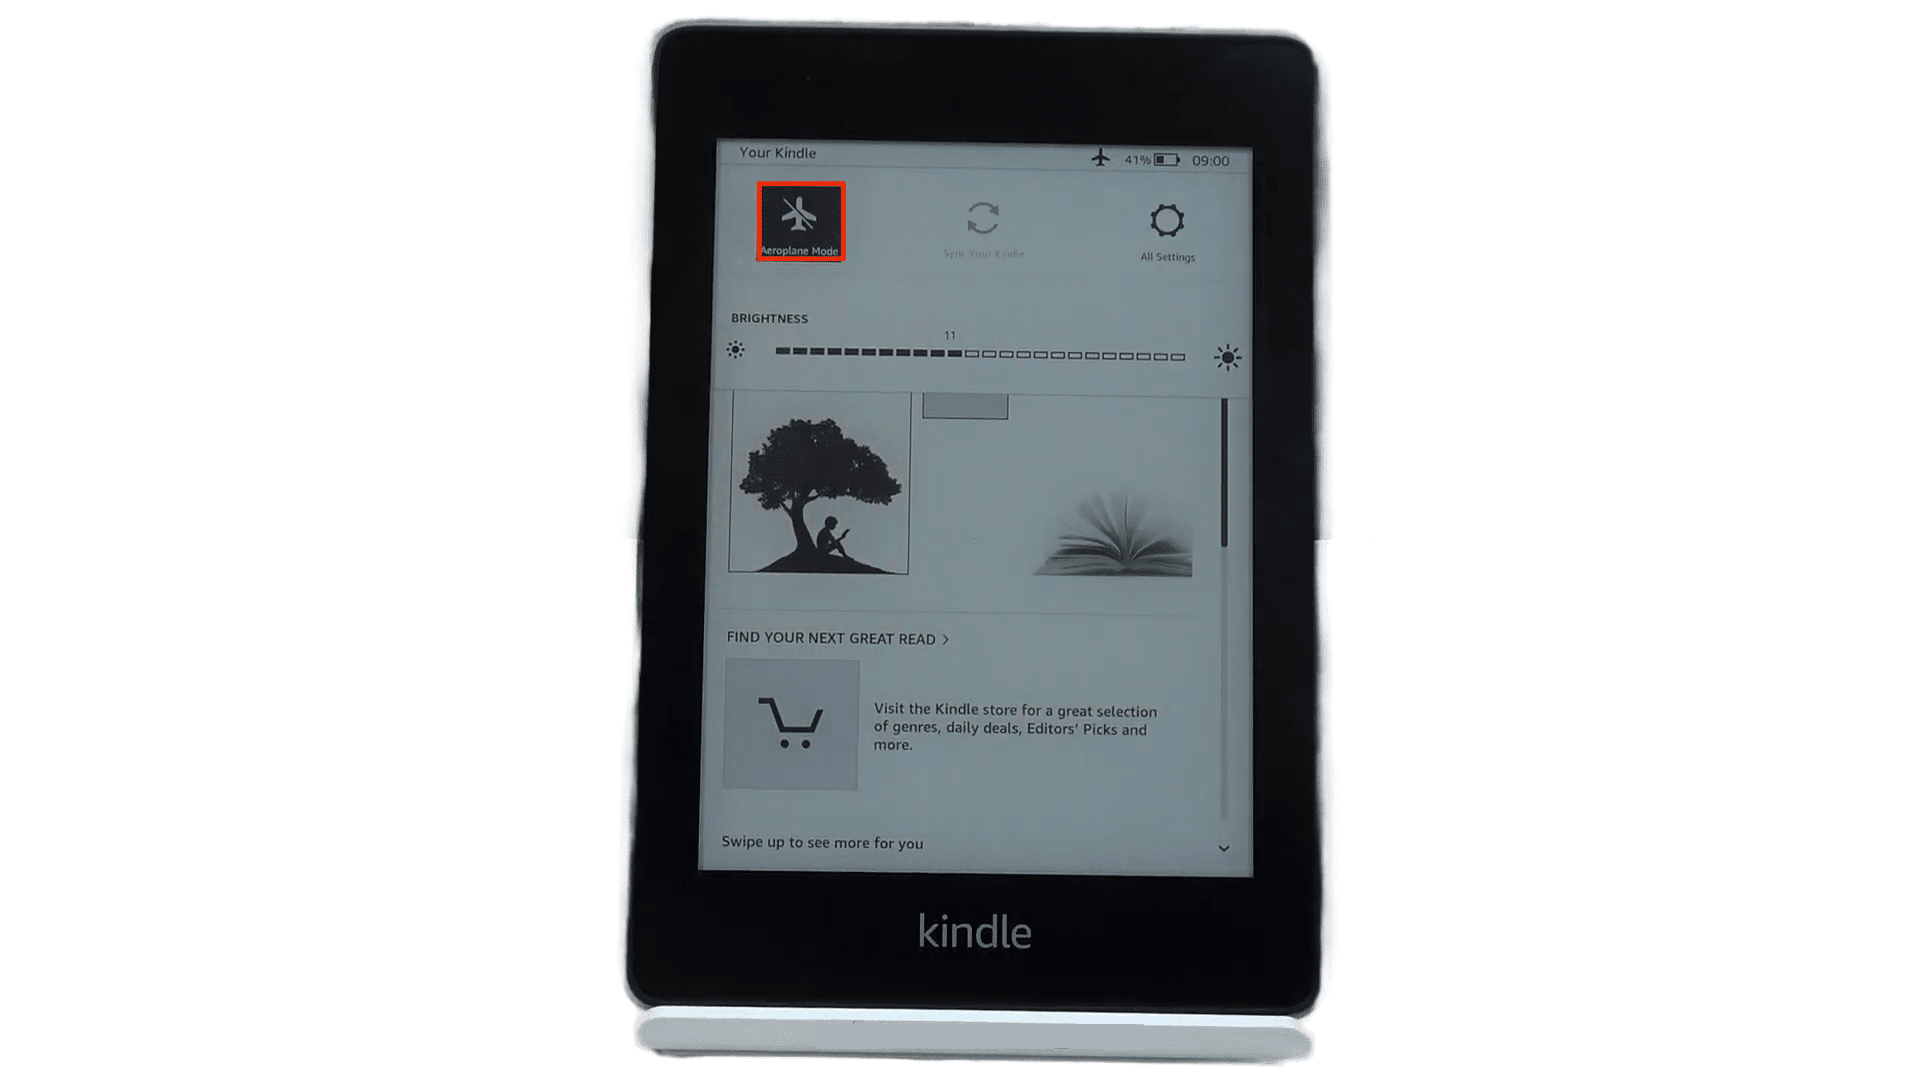
Sometimes you activate the airplane mode by mistake. It shuts down all the network connectivity options on the device. Simply swipe down and check if the Airplane mode is on. Tap on the icon once to turn it off and check if you can connect.
Restart Your Kindle
Apply the simplest and most popular solution first. Give your Kindle a quick reboot.
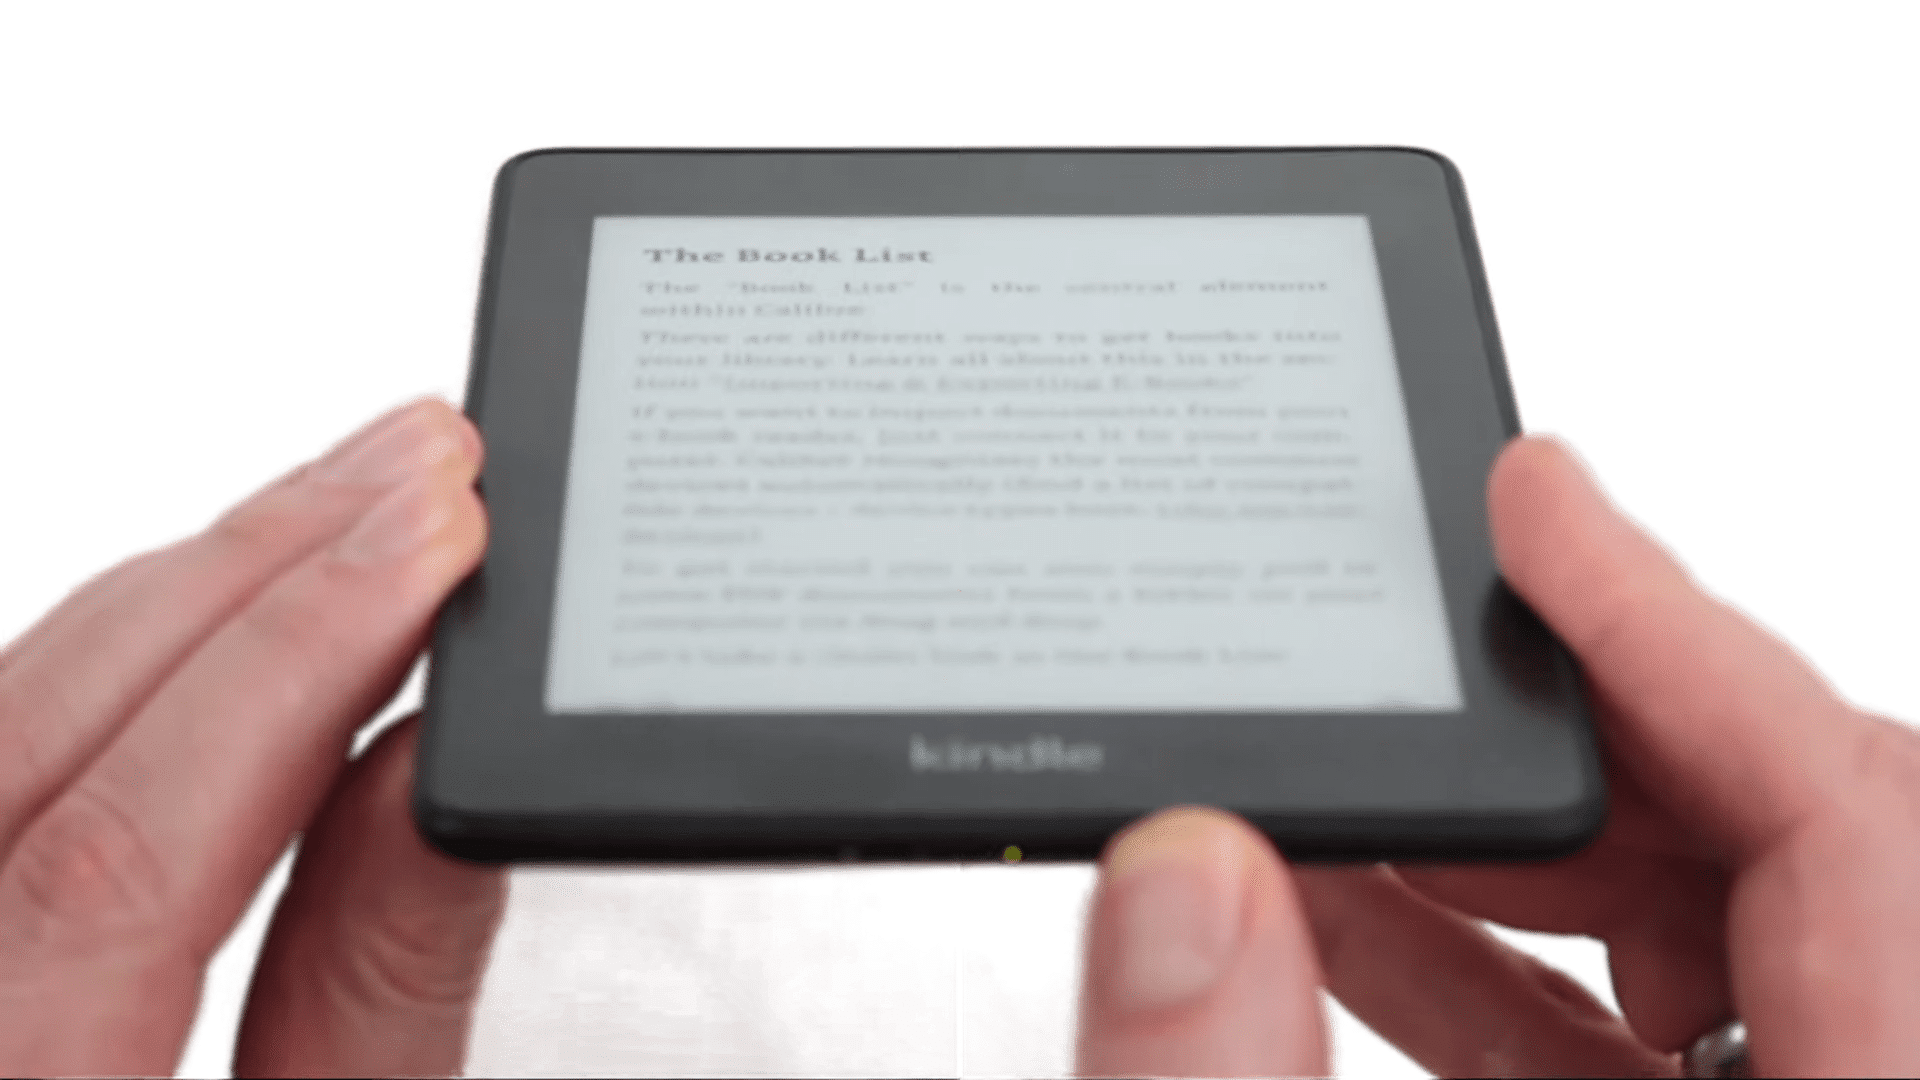
- Press and hold the Power button for a couple of seconds.
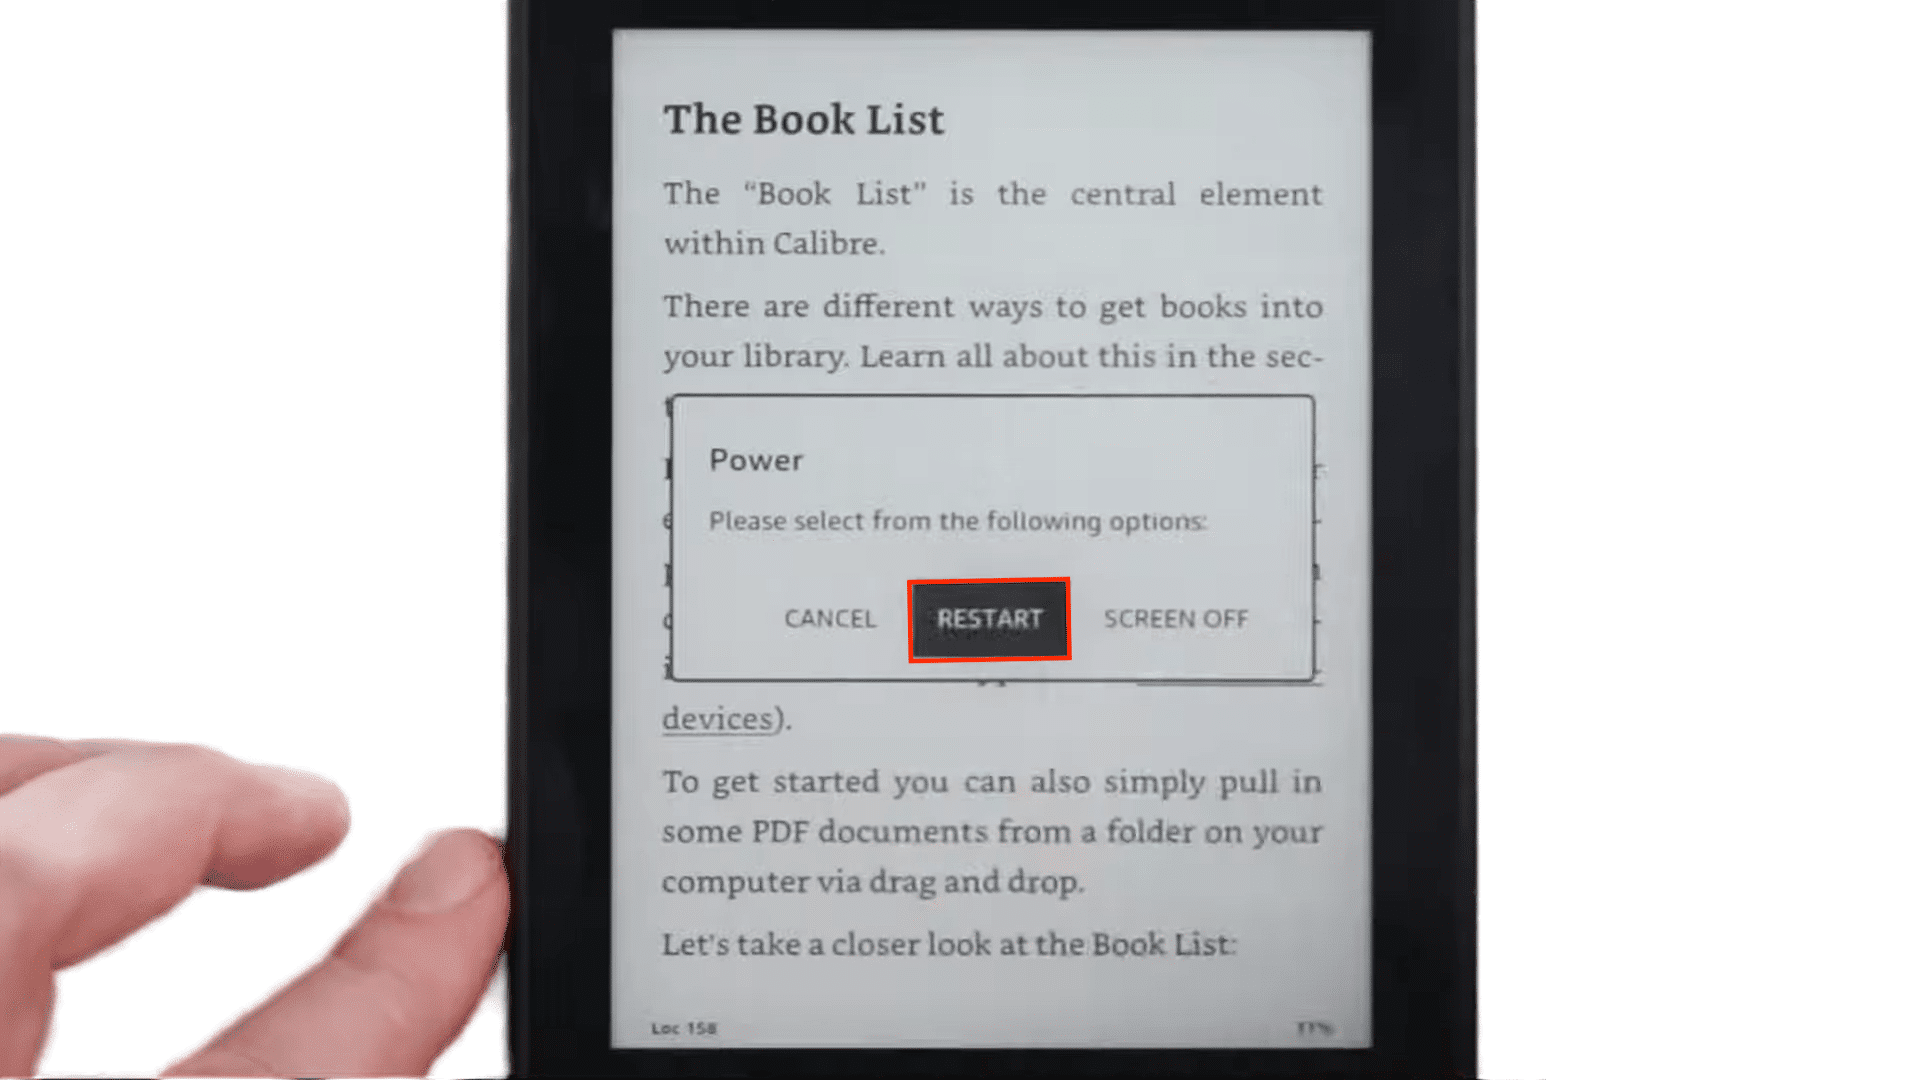
- Tap on Restart.
- Wait for the device to boot again.
- When the device is turned back on, check if the device can detect and connect to your preferred network.
Check Your Router Settings
Every router has the option to block specific devices from using the network for security reasons. Make sure your device is allowed to access the network.
- Go to your router setup page and click on wireless networks.
- Click on Security and then check if your device’s IP address is present in the block list.
- If yes, remove it using the appropriate option. And restart the router.
- Turn off and on the Wi-Fi on your Kindle and try to connect again.
2. Delete All Wi-Fi Passwords
If any of the solutions mentioned above didn’t work. You can play around a bit with Wi-Fi settings on your device.
- Tap on Settings or Swipe down to bring out the quick settings menu.
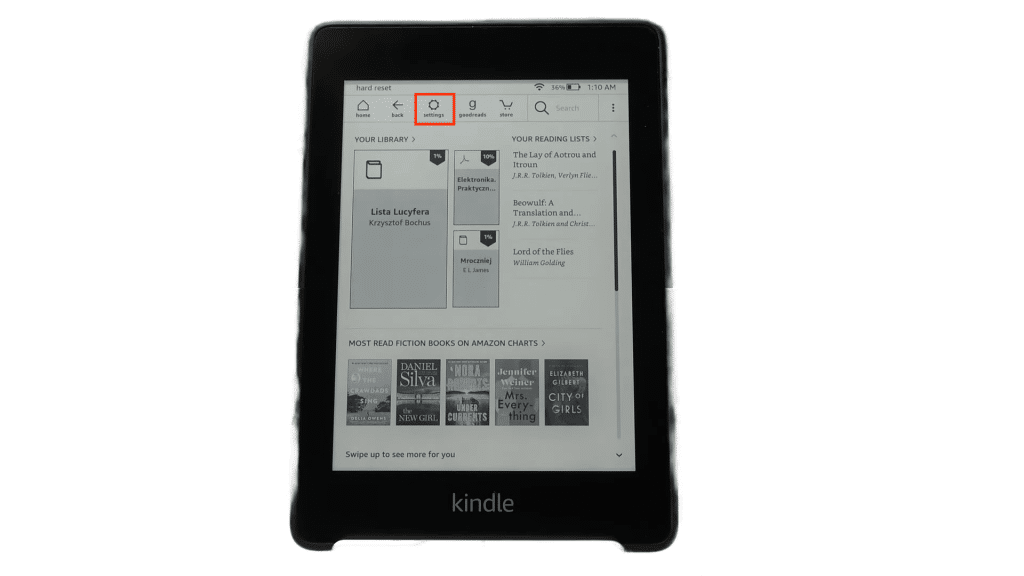
- Tap on All Settings to go to the system settings page.

- Tap on Wi-FI & Bluetooth and then select Wi-Fi Networks.
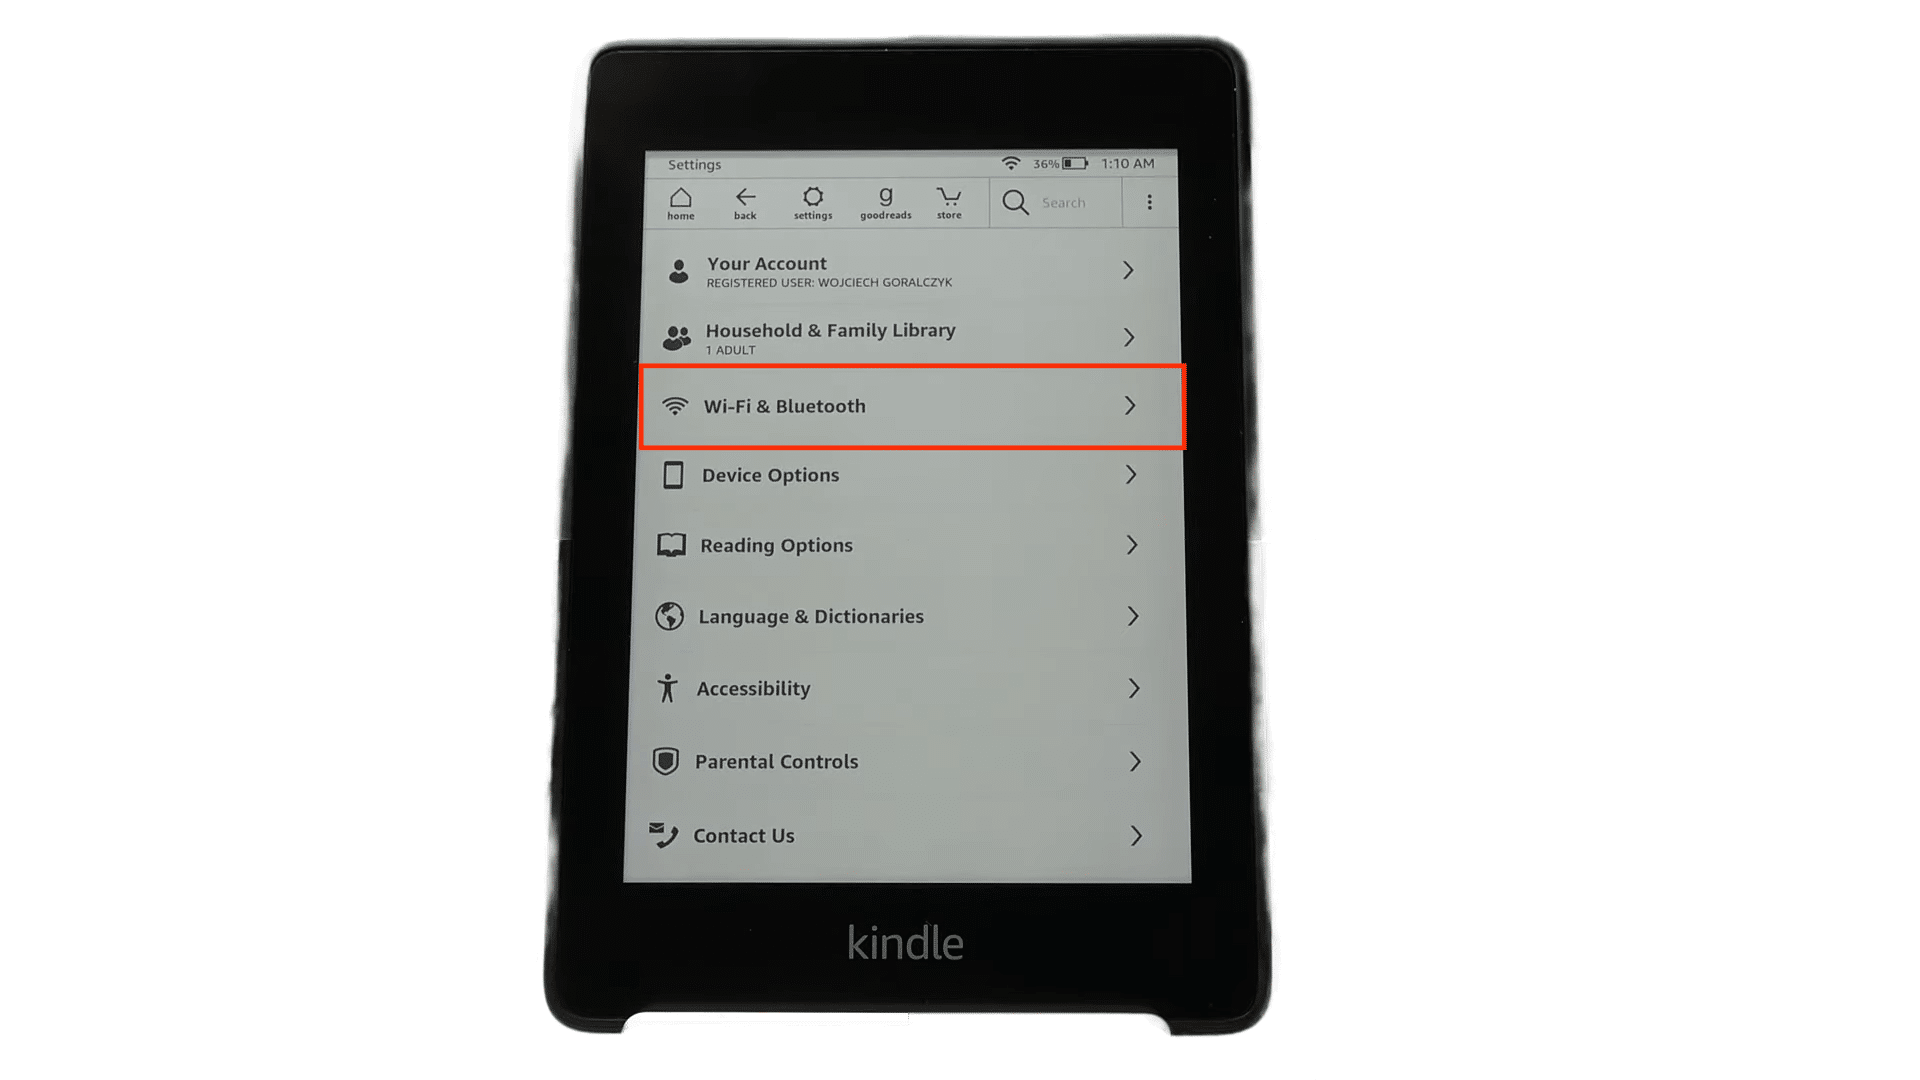
- Here you will see a couple of options. Tap on Delete Wi-Fi Passwords.

- It’ll open a follow-up pop-up asking you to confirm the activity. Tap on the Delete button.
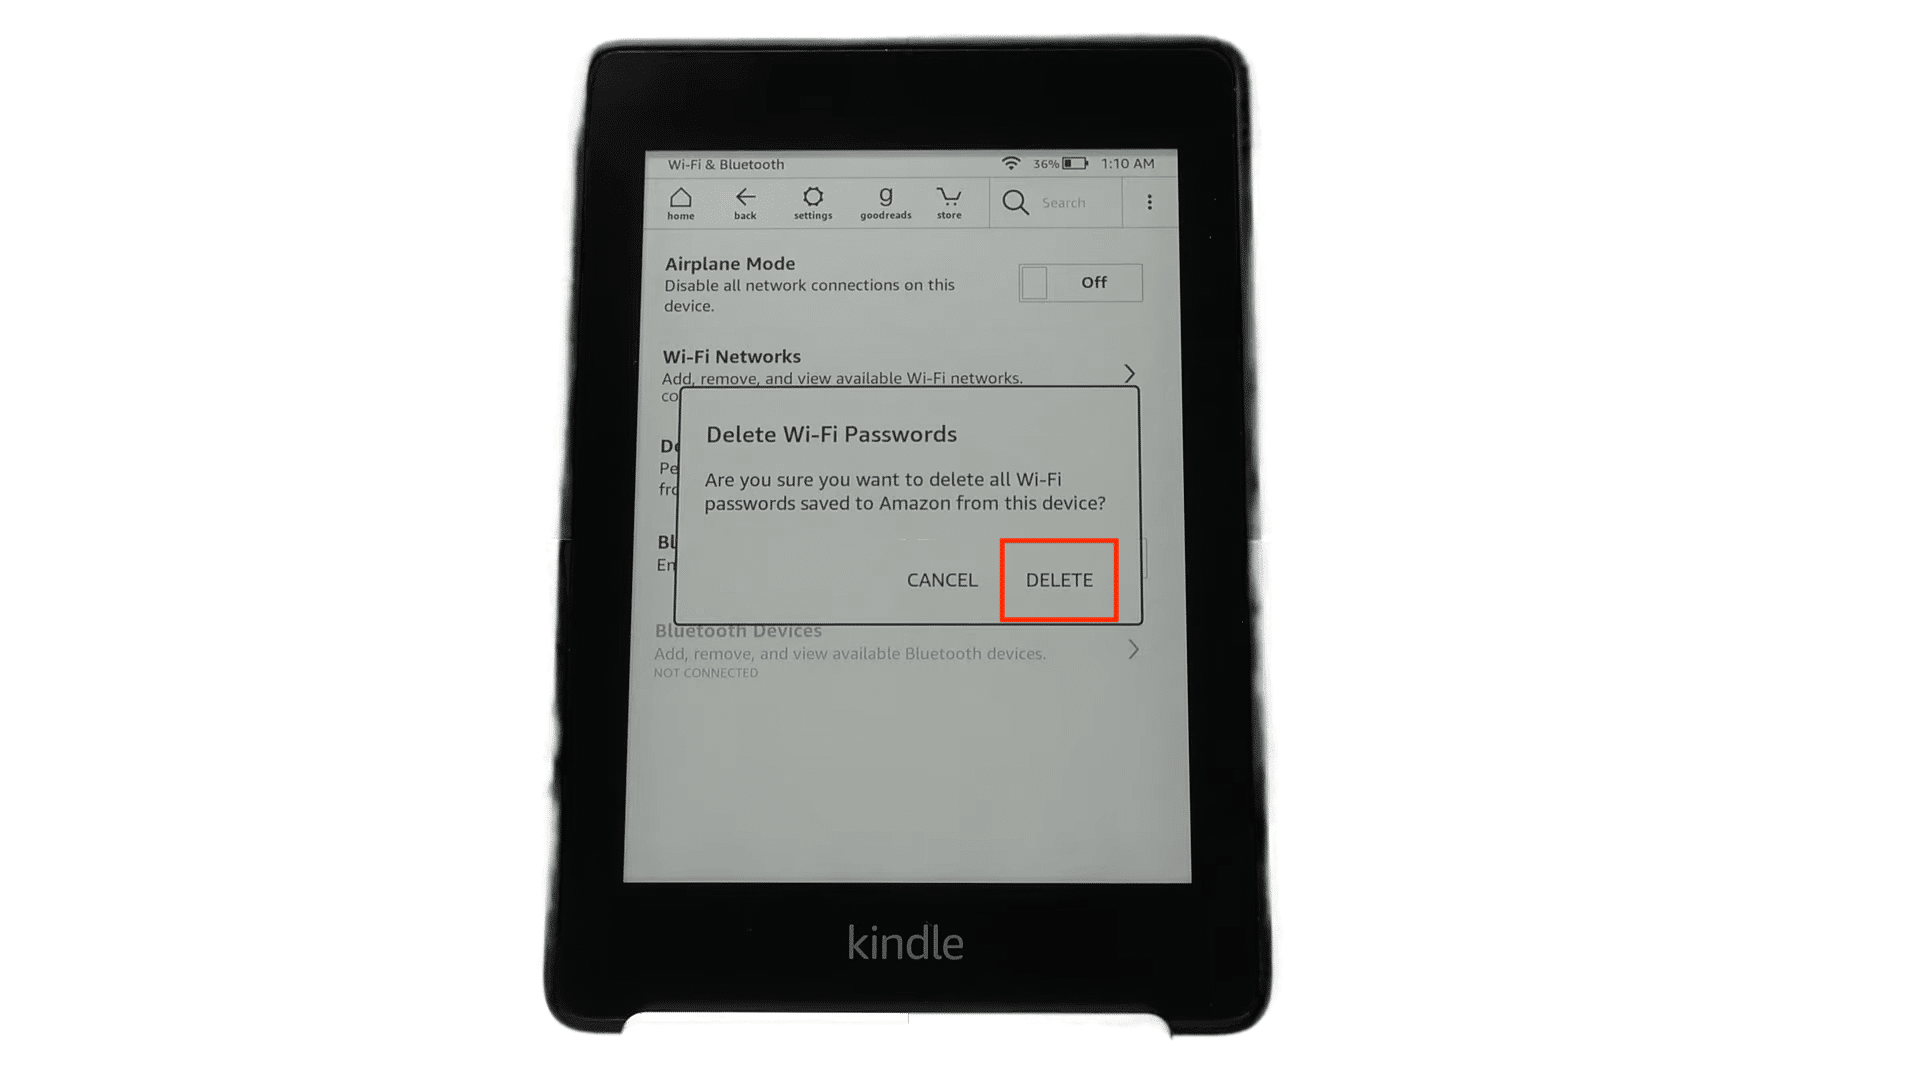
- Now, reconnect with your WiFi router by entering the password and check if Wi-Fi is now enabled on your Kindle.
3. Make Changes in Home Network
If the Fire tablet not connecting to WiFi persists, try the following fixes:
Disconnect Other Devices
Some routers limit the number of devices you can connect to them. This means if too many gadgets are connected to the same router, the last one to connect will not get Wi-Fi access. To rectify this, disconnect some of your devices or all of your devices. Now, turn on the Wi-Fi on your Kindle and try to connect to Wi-Fi again.
Restart The Router
Turn off your router and start it after 5-10 minutes. This will reset all the settings and preferences. Try to connect to the network to check if the problem persists.
Change Wi-Fi Name And Password
Go to your router settings page and change your wireless name and password. Repeat Step 2( Forget the Wi-Fi connection, and try to connect again.
- To change the Wi-Fi name, Login to your router home page. If you are asked to enter the password, type admin. It is the default login password for your modem.
- Click on Wireless on the router homepage to open the Wi-Fi settings page.
- Type your desired Wi-Fi name in the box next to Wireless Network Name and click on Save.

- Next, click on Wireless Security.
- You can select Disable Security and try to connect without using a password. Or click on WPA/WPA2 and provide a new password.
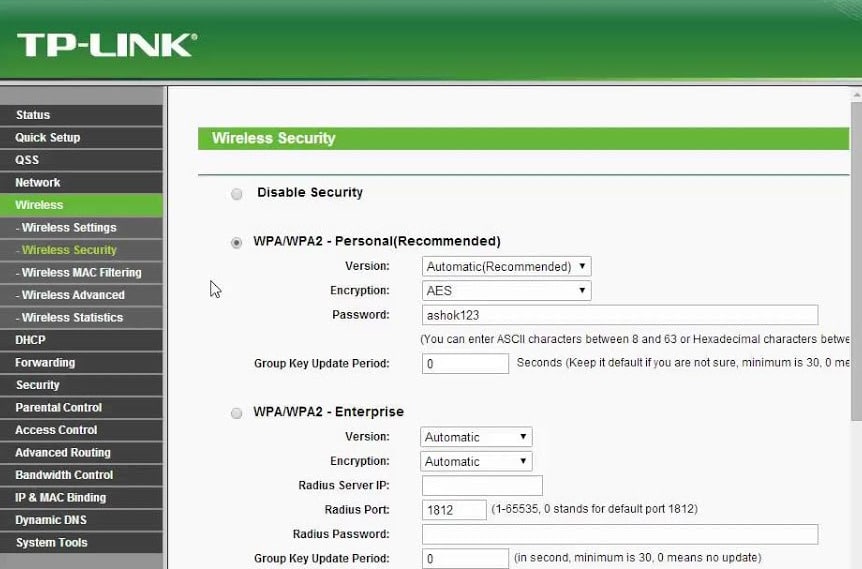
- Click on Save.
Connect to a 2.4GHz Band
If your service provider has multiple frequencies in the network, try to connect with the 2.4Ghz Band. Sometimes, the device cannot detect the higher frequency due to the lack of an update or some other technical glitches.
Reset the Router
If none of the solutions work, it’s time to reset the router to make sure the problem is not caused by the Router or the network provider.
- To reset, look for the tiny reset button on the back of the modem.

- Use some tiny pin to press the switch.
- Press and hold for 30 seconds.
4. Update Kindle to the Latest Software
A system update might fix all the network-related issues. To check the update:
- Tap on three lines or three dots at the top right corner and open Settings from the menu.

- Once there, look for Device Options and then tap on Advanced options.
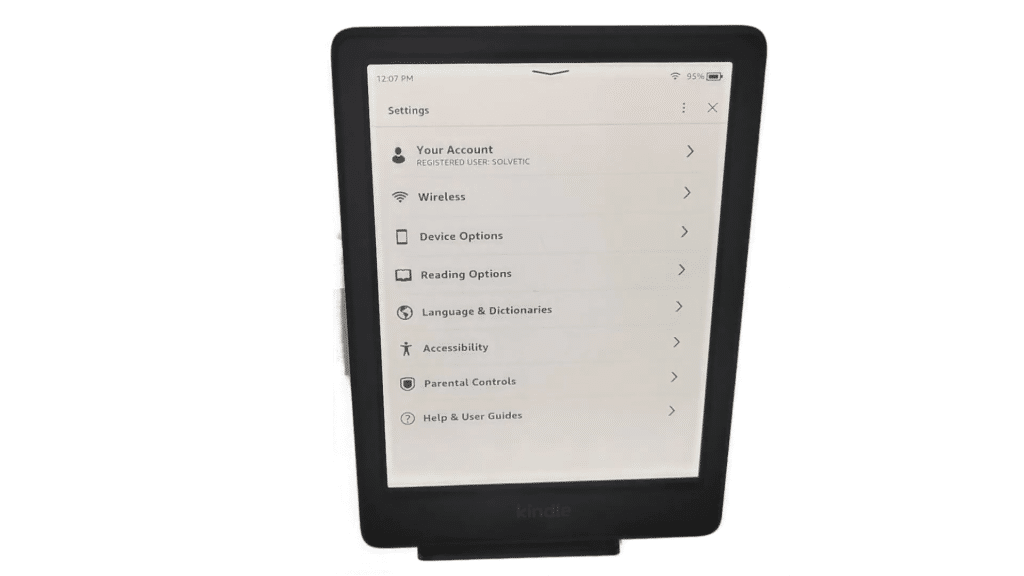
- Here, you’ll see an option called Update Your Kindle. If an OTA update is available, the option would be enabled. You can download the update and proceed with the installation.
- If the software update option is disabled, there’s no update available, and you can try a manual update.

Manually Update Your Kindle to the Latest Version
To manually download and update the software,
- Open the settings page on your Kindle and note the current software version.
- Now, open Amazon’s Kindle E-Reader Software Updates portal on your PC.
- Navigate to the Kindle model you own and check if the software version is different from your Kindle.
- If the version on your device is similar to the latest one on the Amazon Software Update page, abort the procedure.
- If the software version is different, you’re good to go!
- Click on the Download Software Update and save the file on your computer.

- Once the download process is completed, connect your Kindle Fire using a USB cable.
- Select File Transfer on your Kindle to allow data transfer between your computer and tablet.
- Open the Fire folder on your Computer file manager. Inside, you will notice a folder named Internal Storage.
- Copy and paste the download file to this folder.
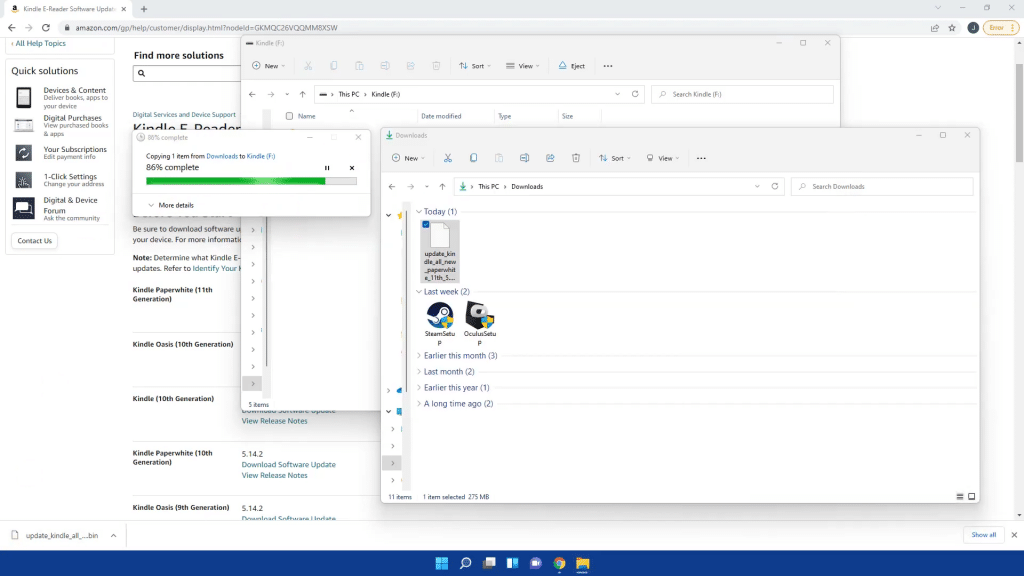
- Go to the System Updates on Your Kindle and click on Check Now.
- The latest updates have been applied automatically.
5. Reset Kindle to Factory Settings
If your Kindle fire keeps losing WiFi connection after the software update, you might want to try to restore it to factory settings.
To factory reset your Kindle,
- Swipe down to launch quick settings and click on Settings.
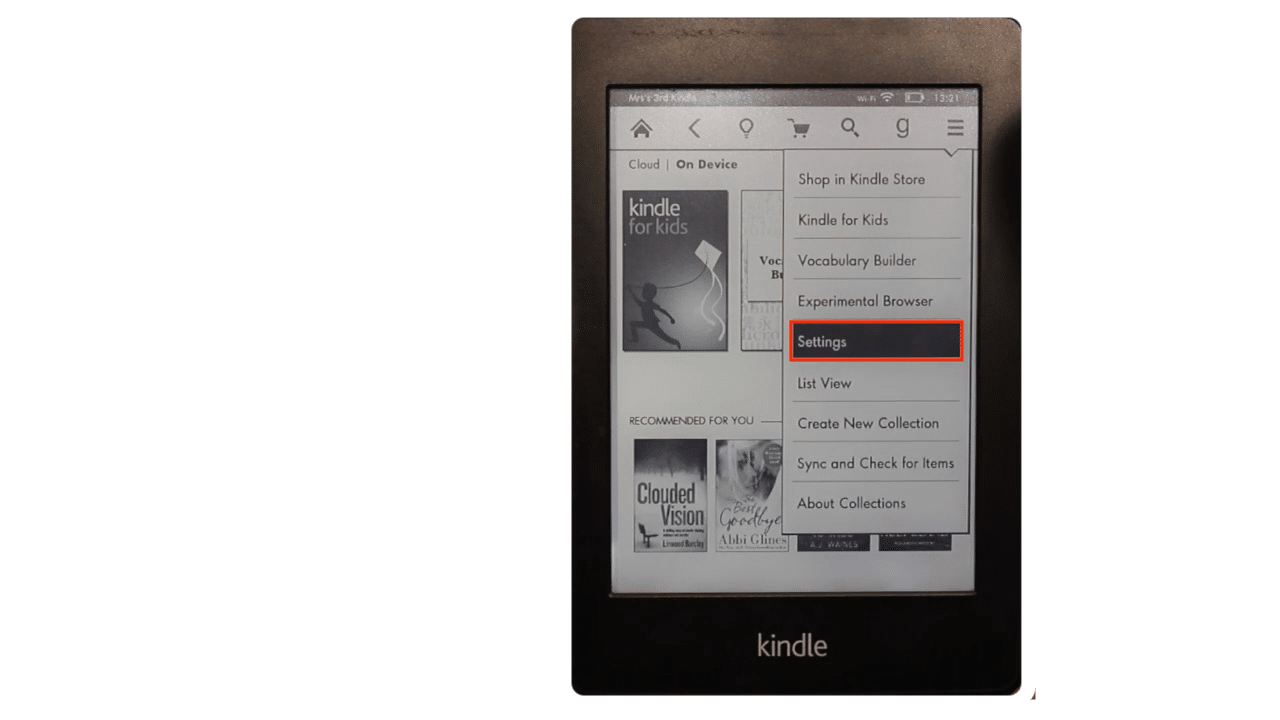
- Go to Device Options and select Reset.

- Click on Reset Device. Tap on Yes to confirm.

- Your Kindle will be restored to its factory settings.
Hopefully, Kindle won’t connect to WiFi (authentication problem) should be solved by now.
Frequently Asked Questions
Why won’t my Kindle connect to Wi-Fi?
There can be several reasons behind Kindle cannot connect to WiFi problems. A 5GHz network won’t be detectable on Kindle on most occasions. Also, your device may be missing some updates containing essential patches.
How do I fix my Kindle that won’t connect to Wi-Fi?
If your Kindle won’t stay connected to WiFi, you can try changing your WiFi username and password in your modem settings. If this doesn’t work, simply restore your Kindle to factory settings and reset your WiFi router.
Does Kindle support 5GHz Wi-Fi?
Kindle tablets only support 802.11b and 802.11g, which are 2.4GHz networks.
Conclusion
There you go. If your Kindle fire won’t connect to WiFi, you can apply any of the above fixes. Make sure you take a backup of all your data before you reset your fire device. If somehow none of these solutions work for you, take your tablet to the nearest service center and get it checked for a hardware failure.
Suggested Resources:


I love you! Your very first recommendation worked!